Showing posts with label SU. Show all posts

Tuesday, October 8, 2019

Canal Class September 26, 2019

My first card was created with Seaside Notion stamp set and paired with Tasteful Backgrounds dies.  I saw a card on Pinterest that inspired me.  The colors I used were Grapefruit Grove and Coastal Cabana cardstock.  The inks were Crumb Cake, Calypso Coral, Coastal Cabana.  The shell is colored in with Crumb Cake Light Blend and Grapefruit Grove Marker.


 The second card I used Detailed Bands Dies and Beautiful friendship stamp set.  I cased this card from Julie Gilson  her blog is www.stampingala.com  I loved all 3 projects she did with this set.  I think it was a Facebook live that I watched.  I also loved the color combination of Coastal Cabana and Highland Heather.  Can you guess that Coastal Cabana is one of my favorite colors?  The ribbon is Gorgeous Grape.  She really showcased the Scripty Embossing Folder.  After completing the stamping on the front I ran it through the Bigshot with Scripty EF.  WOW it just takes it up a notch.  This is a 3D folder so use the Blue Plate with your Big Shot.


Nancy wasn't at class last time so she didn't see my cards.  Turns out she cased the same Woven Heirloom card I saw.  Hers was different colors Bermuda Bay and Very Vanilla.  She created the background with the long textured stamp using the Hinge Technique with her Stamparatus.  If you don't know what that is I have a class on October 14 at 1 pm teaching that techniques and other Stamparatus techniques.  This is a small class at my home so you can learn how to set your stamps out and make the most out of your Stamparatus.  Her second card uses Toile Christmas Bundle.  The greeting is stamped in Real Red.  The branch is colored with blends and then the background is sponged.  I'm guessing it was Pool Party ink.


Monday, October 7, 2019

Canal Class September 12, 2019

Both my cards were cased this time.  I used Woven Heirlooms Bundle.  The center piece of paper with the sympathy greeting is DSP called Woven Threads.  The frame was cut from Pretty Peacock cardstock.  Using two pieces of the stamp set the 4 x 5 1/4 piece was stamped with Sahara Sand and Pretty Peacock ink.  To add a little more texture I stamped on the leaves and punched them out with Leaf punch.  I also used the sprig punch and sparkle glimmer paper.  The flower was cut with Medium Daisy Punch.

This next Christmas card is my very favorite bundle from the Holiday Catalog.  It's called Frosted Foliage.  The colors are Whisper White and Seaside Spray.  I few rhinestones just finishes it off.  If you really want to step this card up, you could use the new Shimmery Crystal Effects and Ice Stampin' Glitter.  It will take at least a hour to dry.

These next 2 cards were prepared by Nancy but Keely helped her out and taught the class with me.  Special thanks to my friend Doris for finishing the last hour of my class so I could make my changed flight to my nieces wedding.


Wednesday, September 18, 2019

Upcoming Christmas Classes

Make these 4 cards for $15 on Friday October 4 at 9 am.  The classes will be at my home.  Please prepay.
Make these 4 cards for $15 on Thursday November 21 at 1 pm at my house.  Please prepay.

Do you have a Stamparatus but are unsure how to use it?  Have you thought about buying one but would like to try it out first?  This class is for you.  We will make 4 Christmas/Holiday cards while learning some Stamparatus techniques including how to set it up to make multiple cards.  The class is Monday October 14 at 1 pm.  The cost is $15.  I have not designed the cards yet but they will be layered cards like the 2 classes above.  Contact me today if you are interested.

Tuesday, July 23, 2019

She Said Yes!

My youngest daughter was recently engaged.  This is the card that I made for her.  I used the stamp set Wonderful Moments.  The colors are Whisper White and Flirty Flamingo.  See the close up below with Wink Of Stella used over the dress area.  I used Stitched Be Mine dies.  I placed the hearts from the die inside to make fun confetti.  I also used a new embossing folder Eyelet Lace.  The ribbon is retired.  The verses are stamped in Versa Mark and heated with silver embossing powder.  I used my Stampin' Blends to color the image.  We are already having fun planning the wedding!  thanks for looking.

Thursday, November 1, 2018

Fall Wedding in Wisconsin

This is the card I created for my niece Amy and her fiance Scott.  The wedding is at Trinity Barn in Oconomowoc, Wisconsin this weekend.  I sure hope it's not too cold.  Living in Central Florida now, I am not used to the cold.  It dropped to 50 degrees last night and my feet were freezing.  I used the colors of her wedding Island Indigo and Tangerine Tango( both retired colors).  I used the Barn Door stamp set and matching dies.  The sentiments and flowers are from Beautiful Bouquet .  The bride I stamped inside is from Wonderful Moments.  I'm sure glad both my nieces are getting married so that I had a good reason to buy this beautiful set.  It was so much fun to make.  I had to take the ribbon off the wedding invitation to finish this card ,as I no longer had any Island Indigo ribbon.  I used White Shimmer cardstock for the door, Island Indigo for the card base, Tangerine Tango cardstock for the front sentiment and the barn door hardware is Silver Foil paper. The wreath is stamped with Crumb Cake ink on Crumb Cake cardstock.  I'll try to post a picture from the wedding next week.  It will be a busy week with a wedding in Wisconsin then the On Stage in Orlando celebrating 30 years.


                                                                   Inside of card

Tuesday, November 14, 2017

Why Reserve Your Stamparatus November 16 at 4 pm

TH_Stamparatus_01TH_Stamparatus_02TH_Stamparatus_03
Here's what you get.                    Store magnets underneath       7" x 7" base

Why do YOU need one? You’ll fall in love with stamping all over again when you learn everything you can do with it!
  • Make multiples with ease
  • Consistently stamp crisp, clean images
  • If you want a darker impression, apply more ink and restamp—no need to start over
  • Make fewer mistakes, saving time and money
  • Easily create 2-step, 3-step, and 4-step stamped images using reversible plates
  • Develop new and specialized stamping techniques with adjustable stamping plates and precision placement


RESERVATION WINDOWSAVAILABLE TO SHIP
November 16–30, 2017Approx. February 1, 2018
December 5–30, 2017Approx. March 19, 2018
January 15–30, 2018Approx. April 15, 2018
REMEMBER EACH OF THESE RESERVATION TIMES ARE WHILE SUPPLIES LAST. THE FIRST 2 WINDOWS THE DELIVER TIME IS DURING SALE A BRATION.   ADD ONE $1  ITEM OR MORE TO YOUR ORDER BEFORE SHIPPING AND YOU WILL QUALIFY FOR A FREE ITEM.  I WILL ALSO OFFER YOU A FREE TRAINING CLASS.

Customer Stamparatus Launch Q &A
Q: How do I reserve my Stamparatus? A: Normally you order Stampin’ Up! products through the online store; in this case, you will click the RESERVE link on the Stamparatus page which will take you to the reservation page. For step-by-step instructions, please see the How to Reserve Your Stamparatus Tutorial for Customers. 
Q: What if I do not have a Stampin’ Up! customer account? A: To reserve a Stamparatus, you must have a customer account. To create one, click Create Account on the online store.
 Q: Why does it take so long for the Stamparatus to ship? A: We will place an order with the manufacturer based on how many reservations are made during any given reservation window. Shipping dates depend on how long it takes the order to arrive in our warehouse after the tools have been manufactured. 
Q: Will the available-to-ship dates be the same for all markets? A: Yes.
 Q: Am I billed at the time I reserve my Stamparatus? A: No. However, a credit card is required to reserve the product. 
Q: When will I be charged for the Stamparatus? A: When inventory arrives in the warehouse, we will add your reservation to a shopping cart. We will then send you an email notifying you that your Stamparatus order is ready. Once you finalize payment and close your order, the system will charge your credit card.
 Q: Will I be able to add other products to my Stamparatus reservation? A: No. However, once your reservation is transferred to your shopping cart, you will then be able to add other items to your order. Important note: Please do not delete the Stamparatus from your order. We will not be able to add it back and you will lose your reservation. 
Q: Will I be able to update my address and credit card information when I open my shopping bag to complete my order? A: Yes. 
Q: What if I change my mind and want to cancel my reservation? A: You can cancel your reservation at any time. To cancel, please see the How to Reserve Your Stamparatus Tutorial for Customers PDF. Q: Will the tool be available in the 2018–2019 annual catalog? A: Yes. Once the annual catalog ordering period begins, you will be able to order the Stamparatus as you would any other product. Reservations will no longer be required, and there will be no limit on the number of tools you can order.
 Q: Once the Stamparatus has been added to my shopping cart, how long will it stay there? A: Indefinitely. As with all products, it will be subject to temporary interruptions in availability depending on demand. 
Q: When I close my order, can I take advantage of current Stampin’ Up! promotions? A: Yes. Q: Can I participate in all three reservation periods? A: Yes. 
Q: How many stamp placement tools can I reserve per reservation window? A: For customers, there is a limit of 1 per reservation window. 
Q: How did we come up with the name Stamparatus? A: We landed on an innovative name by combining two words that speak to the end use of the tool as well as Stampin’ Up! branding. Stamp: To impress a pattern or mark (especially an official one) on a surface, object, or document using an engraved or inked block or die or other instrument Apparatus: The technical equipment or machinery needed for a particular activity or purpose Stamp + Apparatus = Stamparatus


Monday, November 13, 2017

Reserve Your Stamparatus Thurs Nov. 16 at 4 pm Eastern!

I just returned from On Stage Salt Lake City where they announced the launch of our newest product, Stamparatus for $49 plus shipping and tax. The room was roaring when they announced this to demonstrators in attendance. This is a must have tools ladies.  It is unlike any stamp tool on the market.  It has 2 open edges allowing any size paper.  There are 2 plates and 2 sides. That makes 4 surfaces to place stamps for perfect positioning.  The plate lifts off and can be moved down a notch for perfect repeat stamping.  Watch the video below and be amazed.  THIS IS THE FIRST TIME BOTH CUSTOMERS AND DEMONSTRATORS CAN ORDER THIS TOOL AT THE SAME TIME.  Because of the limited supply it will be a reserve system.  You must reserve it at the online store with a credit card.  Please make sure I am listed as your demonstrator and you have the correct address listed under my account.  Please read the Q & A posted below.  Those who order on November 16-30 while supplies last will receive theirs around February 1.  You will not be charged until the item ships.  You will receive an email to go back to the online store and finalize your order.  You will be able to add other items at this time, receive special promotions going on, and put in a hostess code if needed.  Remember Stampin' Up is available for questions if you need help.  Call 1-800-STAMPUP.  Earn a free class on using this tool from me by reserving yours on November 16-30.
See the  Five Things To Know About Stamparatus video

See Q & A for Customers click here

How to Reserve Your Stamparatus Tutorial for Customers Flyer click here

Don't forget to set your phone alarm for 4 pm Thursday November 16 to remind you to get your reservation in for purchase of this exciting must have tool.  You can start by clicking the sun at the right of my blog page to get you directly at my online store.  You can get your online account set up in preparation for Thursday.  You will also earn special training from me in a free class!

Saturday, February 4, 2017

Sweet Pop and Twist Card

These pop and twist cards are very popular right now.  I learned how to make one last week at my Seabreeze Stampers Club from a new friend Pat.  She gave excellent directions.  Then my friend and downline Doris came over yesterday for some stampin' girlfriend time.  We made a pop and twist card using a different set of instructions.  We used the directions from LeAnn Greff, I believe.  The pop and twist part used a 8 1/2 x 11 sheet.  Doris wanted to learn the method I used last week.  This is the card I created.  I will be teaching it to my group in our Team Shoe Box Swap next week.  Want to be part of my Team and meet with other inspirational stampers?  Contact me today.  Check back tomorrow to see Doris' card.  Order from my online store with this hostess code NSNE3QPQ
                                                                   This is the inside.


Monday, October 31, 2016

Stitched From The Heart

Here's a video showing some products made with the new Stitched Frames available in November.  Enjoy!  Get this reasonably priced set of stitched frames of 4 squares,4 ovals and  4 circles.  All the commonly used sizes in one great set.  Item #145372 for $30.  Hostess code 7UY79E4T

Wednesday, February 10, 2016

Botanical Sampler Christmas Gifts

 This is the 8" x 8" framed art sampler I made for those in my first level this Christmas.  Each square is 2" x 2" and the DSP is 1 7/8" square.  I heat embossed the Enjoy the little things with black embossing powder.   I love the You Grow Girl on the garden pick!  This was so much fun to make.  If you are interested in making this project, let me know.  You will need to buy your own frame.  The class will be $20.  Speaking of my team, now is a great time to join the Stampin' Up family.  It is just $99 for the starter kit.  There is no shipping.  You pick any product totaling $155.  You will also get catalogs, order forms.  You will save 20% on all orders after that.  Contact me today or sign up by clicking here.  Then on join the fun.  Just want to order this fun Botanical Bundle click here. 


Monday, December 21, 2015

Pop-Up Birthday

I had some time now that the Holiday Rush is over for me.  The parties in The Villages are over and many people have left for Christmas or are busy with company.  I finally have time to play with my new stuff.  I love this new birthday suite of products.  Both the cake on the front of the card and the Hip Hip Hooray on the inside can be popped out on the inside.  The Party with Cake stamp set has lots of fun sayings for the inside.  Just what we have been asking for!

Sunday, December 20, 2015

Botanical Gardens Post It Note Holder


Here is the first post it note holder I made for a gift for someone special.  I used the new Botanical Gardens DSP, Botanical Blooms stamp set, and Botanical Builder Framelits Dies.  All these products are in the Occasions catalog starting January 5, 2016.  Come check out all the new products at an Open House on January 5 at Nancy Thompson's house.  More information on my blog in the next 2 weeks.   I sponged a little ink on the edges of the flowers to make them pop.  I used 3" x 3" post it notes.  The cover dimensions are 6 3/4" x 3 1/4".  I scored at 3 1/4" from each end.  I used tear and tape to adhere the post it note paper inside.  The DSP is cut at 3" x 3".  Here are 2 more.  Which is your favorite?  If you would like a Occasions catalog, contact me today or attend our open house on January 6, 2016.


Tuesday, November 17, 2015

On Stage Tampa Swap Card

This is the card I swapped with other demonstrators this past weekend at the On Stage Local event in Tampa Florida.  It uses Pretty Thankful stamp set.  We made a similar card at Canal Street Rec class recently.  I used a Mojo Monday 351 layout to get started.  I love the color combo of Mint Macaron and Tip Top Taupe.  The picture below shows me winning a Sale-a-Bration stamp set available January 5 with a $50 purchase.  Who doesn't love to win free stuff?  What else did we do at this event?  Well we saw presentations on how to use the new products, celebrated demos achievements, ate lunch together, and played with new product.  It's was so fun to be the first to see upcoming product.  Attending this event allowed those attending to see new products before everyone else.  We cannot share even with our demo friends who were not able to attend until November 16 at 10 pm Mountain Time.  Want to join my team so you can attend these special events?  Contact me today to find out how   .

Sunday, August 30, 2015

Nancy's Cards from Canal Street on August 27, 2015


Here are the adorable cards Nancy taught at our recent class.    The set is called From Land to Sea.  I love anything to do with the sea.  How about you?  The bright cards on the star card really make it pop.  What a happy card for a birthday for a child or adult.  The stamp set is You're So Sweet and the star is cut with the Mini treat Bag Thinlit.

Friday, August 21, 2015

Snowman Shaker

This card uses Sparkly Seasons stamp set available September 1.  It is a shaker card using a 4" x 6" cello bag cut down to approximately 3" x 4".  You can make this card at one of my upcoming Christmas card classes this Fall.  Attend my open house Tuesday August 25 to sign up and see the other cards.

Thursday, August 20, 2015

Want to take a sleigh ride?

When I made this card I used my 2 favorite new products in the Holiday Catalog.  Hearth and Home framelits and Sleigh Ride Edgelits dies are the bomb!  The Home for Christmas paper has such a beautiful vintage look.  You can make this card at my upcoming Christmas card classes.  These products are available for purchase September 1.  Need a  Holiday catalog? Contact me today.

Wednesday, August 19, 2015

Holiday Catalog Sneak Peek Card

I am having a ball creating with my Holiday Preorder stash.  This is the card I created for my Clubs for next month.  I love the Home for Christmas designer series paper.  It has a vintage look.  I used Embellished Ornaments stamp set and Delicate Ornaments Thinlits dies.  Save 15% when you buy them bundled.  The intricate design is easy to cut with the new precision plate.  I used Mossy Meadow CS and Gold Foil sheets.  The Whisper White mat was embossed with the new Softly Falling embossing folder.  Check back tomorrow to see another Holiday card.

 I will have a  mini open house on Tuesday August 25 from 1pm-3pm at 1725 Hagood Loop.  I will have 30 cards on display,holiday catalogs, class sign ups, and a make 'n take.  If you can't attend then, contact me and I am happy to meet with you to plan your Holiday cards.  

Wednesday, June 17, 2015

Canal Street Class Cards from Jume 11, 2015


 The first two cards Nancy taught the group.  They stamped the koala on the Whisper White paper and again on the Basic Gray paper and cut out the body except the ears.  On the second card, blender pens were used to color the inside of the flowers.

The next two cards I taught.  The focus was use of window sheets.  In the first card we made a shaker card.  We used a none Stampin' Up die to create the frame.  We stamped the word create with Black Staz On ink on the window sheet.  The Endless Birthday Wishes cake is stamped on the Whisper White card front.  We made the confetti for inside the shaker card with the fringe scissors.  We used Cherry On Top DSP for the card.  I love the color combinations in this paper!
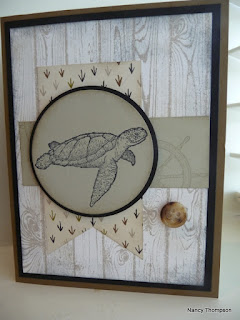
 This second card I cased from Jan Tinklenberg.  We used the window sheet to create the reflection of the ship.  First we stamped on the Very Vanilla piece of cardstock with Tuxedo Black Memento ink. Then we stamped the ship again on a window sheet.  We turned the window sheet over so the ink is facing down and matched up the bottoms of the ship.  Holding firmly, rub on the window sheet to transfer the ink.  We then sponged ink to create the water and added some white gel pen marks for the waves.